
- Your cart is empty
- Continue shopping
-
sales@primiumpoppypods.com
- Posted on
- Categories:Uncategorized
- 0 comments
The Ultimate Guide to Drying Poppy Seed Pods
There’s something truly magical about a poppy seed pod! Those plump, sculptural little heads sitting atop tall stems look like tiny works of art, and when you dry them properly, they become long-lasting treasures for crafts, floral displays, and so much more. Have you ever held a fresh poppy pod and wished you could keep it looking gorgeous forever? I’ve been there!
I still remember the first time I dried a bundle of pods on my kitchen windowsill. I was amazed at how they held their shape and developed that gorgeous, weathered gray-brown finish that designers pay top dollar for! The best part? Drying poppy seed pods at home is easier than you might think.
In this complete guide, you’ll learn exactly how to dry poppy pods step by step. We’ll cover the best poppy pod drying methods, the perfect harvest timing, the mistakes to dodge, and smart storage so your pods last for years. Whether you grew your own or you’re starting with premium pods, you’re in exactly the right place.
Let’s dig in and get those pods perfectly preserved!
What Are Poppy Seed Pods?
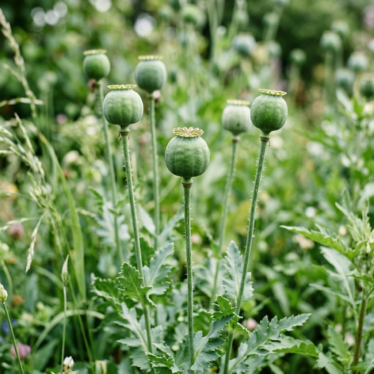
Poppy seed pods are the rounded seed capsules that form after a poppy flower’s petals fall away. Once the bloom finishes showing off its papery petals, the flower’s center swells into a firm, dome-shaped pod packed with hundreds of tiny seeds. It’s nature’s clever way of protecting the next generation of poppies!
These pods come in different shapes and sizes depending on the variety. The most prized for drying and decorative use come from Papaver somniferum, often sold as papaver poppy pods. They feature that classic bulbous shape with a crown-like top, which makes them instantly recognizable and wildly popular in the craft world.
Here’s what makes poppy pods so special:
- Sculptural shape: That rounded body with a ridged crown looks stunning in any arrangement.
- Natural durability: Once dried, they can last for years without losing their form.
- Neutral tones: Dried pods take on soft grays, tans, and silvery browns that pair with almost any color palette.
- Versatility: From wreaths to wall art to tea, these pods do it all.
Fresh pods are lovely, but drying them unlocks their full potential. Let’s talk about why!
Why Dry Poppy Seed Pods?
You might be asking yourself, “Why not just use them fresh?” Great question! Fresh poppy pods are beautiful, but they won’t last. As moisture leaves the pod naturally, it can shrivel, mold, or lose its perfect shape if you don’t control the process. Drying them properly locks in that gorgeous form so you can enjoy them for months or even years.
Here are the biggest reasons crafters, florists, and home decorators love dried poppy pods:
They last a long time. Properly dried pods can hold their shape and color for years. That means one batch gives you endless creative possibilities.
They’re perfect for crafts. Dried poppy pods are a favorite for wreaths, shadow boxes, painted ornaments, and rustic centerpieces. Their sturdy walls handle glue, paint, and wire without breaking down.
They shine in floral arrangements. Mix them with dried grasses, eucalyptus, and other botanicals for that trendy, natural look everyone’s after right now.
They’re great for saving seeds. If you’re a gardener, drying pods lets you harvest and store seeds for your next planting season. Flower experts note that letting pods dry on their stems helps the seeds mature fully before you collect them.
They’re used for tea and decor. Many people enjoy dried poppy pod heads for both decorative displays and traditional preparations.
Convinced yet? I thought so! Before we get to the drying methods, let’s nail the most important first step: timing.
When Should You Harvest Poppy Pods for Drying?
Timing is everything, and this is the step most beginners rush! Harvest too early, and your pods will shrivel. Wait too long, and the seeds may scatter before you’re ready.
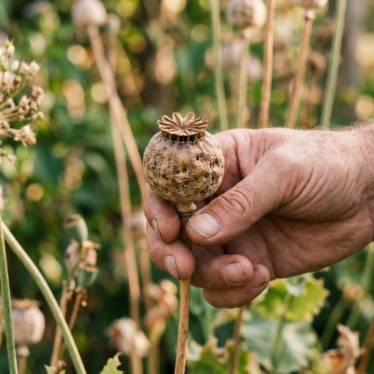
The sweet spot? Pick your pods when they feel firm and the stem shifts from green to tan. Give one a gentle shake. If you hear the seeds rattle inside, you’ve hit the jackpot! That rattle means the seeds have matured and the pod is ready for drying.
Here’s a quick harvesting checklist:
- Wait for the petals to fall naturally after blooming.
- Look for color change as green stems turn golden.
- Listen for the rattle to confirm seed maturity.
- Cut with sharp, clean scissors, leaving several inches of stem.
Horticulture experts recommend letting pods mature on their stems before harvesting so the seeds fully develop. Nail your timing here, and every drying method that follows becomes a breeze!
Step-by-Step Drying Methods for Poppy Pods
There’s no single “right” way to dry poppy seed pods, and that’s the beauty of it! Different methods suit different setups, so pick the one that works best for your space and your batch size. Below, I’ll walk you through the three most reliable techniques: air drying, hang drying, and in-situ drying.
Just make sure your pods are harvested and ready before you start any of these. Now let’s get to the fun part!
Method 1: Air Drying
Air drying is the simplest approach, and it’s perfect for beginners and smaller batches. All you need is a dry, well-ventilated spot with good air circulation.
Here’s how to do it:
- Snip your pods with a few inches of stem attached. Clean, sharp scissors or pruners work best.
- Remove any leaves left on the stems to prevent moisture buildup.
- Lay the pods in a single layer on a mesh screen, drying rack, or a tray lined with paper towels. Spacing matters! Crowded pods trap moisture and can develop mold.
- Place them somewhere warm and dry with steady airflow. A spare room, attic, or shelf away from direct sunlight is ideal.
- Turn the pods every few days so every side dries evenly.
- Wait one to three weeks. Drying time depends on humidity and pod size.
You’ll know they’re done when the pods feel light, the walls sound hollow when tapped, and the color has shifted to that lovely dusty tan.
Helpful tip: Good air circulation is the secret to success. University horticulture guides emphasize that leaving plant materials uncovered with good airflow speeds up drying and prevents mold. Don’t cram them into a closed container until they’re fully dry!
Method 2: Hang Drying
Hang drying is my personal favorite because it keeps the pods perfectly straight and gives them that classic, gallery-ready silhouette. It’s also a huge space-saver since you’re using vertical room instead of counter space.
Follow these steps:
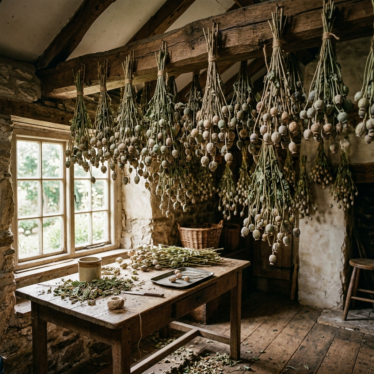
- Cut your poppy pods with long stems, ideally 8 to 12 inches. Longer stems make bundling easier.
- Gather 5 to 10 pods into a small bundle. Don’t make the bunches too thick, or the inner pods won’t dry properly.
- Tie the stems together with twine, string, or a rubber band. Rubber bands are handy because they tighten as the stems shrink.
- Hang the bundles upside down from a hook, nail, or drying line. A closet rod, garage rafter, or laundry room line works great.
- Choose a dark, dry, airy space. Darkness helps preserve the pods’ color and prevents fading.
- Leave them for two to four weeks until completely dry.
Crafters who grow their own flowers swear by this method. One popular dried-flower guide describes simply hanging poppy heads up to dry as one of the easiest ways to get gorgeous results.
Helpful tip: Hang your bundles away from windows. Direct sunlight fades those beautiful natural tones fast!
Method 3: In-Situ Drying (Drying on the Plant)
Want the most hands-off method possible? In-situ drying means letting the pods dry right where they grew, still attached to the living plant. Nature does most of the work for you!
Here’s how it goes:
- Let the flowers finish blooming and allow the petals to fall away naturally.
- Leave the pods on their stems in the garden as they mature.
- Watch for color change. The pods and stems will gradually turn from green to golden tan.
- Listen for the rattle. Once seeds rattle inside, the pods are nearly done.
- Harvest before harsh weather hits. Rain, frost, or strong wind can damage pods left out too long.
This method is wonderful for gardeners saving seeds, since the seeds mature fully on the plant. Just keep a close eye on the weather! A surprise downpour can undo weeks of natural drying.
Helpful tip: If rain threatens before your pods finish drying outdoors, cut them and switch to hang drying indoors to protect your harvest.
Best Conditions for Drying Poppy Pods
No matter which method you choose, the environment makes or breaks your results. Nail these conditions, and you’ll get flawless pods every single time!
Low humidity. Humidity is the enemy of drying. Aim for a space with humidity below 50% if you can. High moisture in the air slows drying and invites mold. If you live somewhere damp, a dehumidifier or a fan can work wonders.
Warm temperatures. A temperature range between 60°F and 80°F is the sweet spot. Warm air pulls moisture out of the pods faster without cooking them.
Great air circulation. I can’t stress this enough! Moving air carries moisture away and keeps mold at bay. A gently oscillating fan in the room is a fantastic helper.
Darkness or indirect light. Direct sunlight bleaches out those beautiful natural colors. A dim, dry room protects the tones you worked so hard to preserve.
Space between pods. Whether laying flat or hanging, give each pod room to breathe. Crowding traps humidity and leads to uneven drying.
Here’s a quick reference to keep handy:
| Condition | Ideal Range |
|---|---|
| Humidity | Below 50% |
| Temperature | 60°F – 80°F |
| Airflow | Steady, gentle circulation |
| Light | Dark or indirect |
| Spacing | Pods not touching |
Get these right and your drying success rate will soar!
Common Drying Mistakes and How to Fix Them
Even seasoned crafters hit snags now and then. Let’s tackle the most common problems so you can dry pods like a pro from day one!
Problem: Mold appears on the pods.
This usually means poor airflow or too much humidity. Fix it by spacing pods farther apart and adding a fan to the room. Aim for humidity below 50%.
Problem: Pods shrivel or collapse.
You likely harvested too early or dried them too fast. Wait for that seed rattle before cutting, and keep temperatures in the gentle 60°F to 80°F range.
Problem: Colors fade badly.
Direct sunlight is the culprit! Move your pods to a dark or dimly lit space. Those beautiful natural tones will thank you.
Problem: Uneven drying.
Crowded pods trap moisture. Whether hanging or laying flat, always give each pod room to breathe.
Master these fixes and you’ll preserve poppy pods with confidence every single time!
How to Know When Your Poppy Pods Are Fully Dry
Here’s a question I get all the time: “How do I know they’re actually done?” Great news, it’s easy to check!
Your dried poppy pods are ready when they show these signs:
- They feel lightweight in your hand.
- They sound hollow when you tap them gently.
- The seeds rattle freely inside.
- The color has shifted to soft tan, gray, or silvery brown.
If a pod still feels heavy or firm, it’s holding onto moisture and needs more time. Don’t rush this step! Sealing up a pod that isn’t fully dry is the fastest way to invite mold. When in doubt, give it a few extra days.
Storage Tips for Dried Poppy Pods
You did it! Your pods are perfectly dry. Now let’s make sure they stay that way. Proper storage is the difference between pods that last a season and pods that last years.
Make sure they’re fully dry first. This rule is non-negotiable! Even a little leftover moisture can cause mold once pods are sealed up. When in doubt, give them a few extra days.
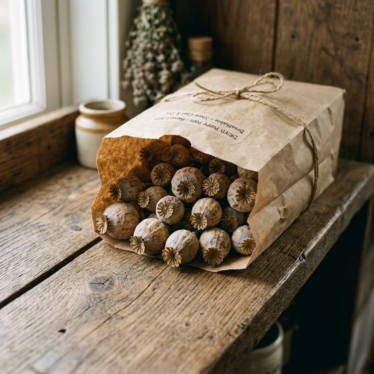
Choose the right container. Cardboard boxes, paper bags, or breathable fabric bags are ideal for long-term storage. They let any remaining moisture escape. Avoid airtight plastic unless the pods are bone-dry.
Add a moisture absorber. Tucking a silica gel packet into your storage box helps keep humidity away from your pods.
Store in a cool, dark, dry place. A closet, cabinet, or storage shelf away from windows and heat sources is perfect. Sunlight fades colors, and heat can make pods brittle.
Handle with care. Dried pods are sturdy but not indestructible. Stack them gently and avoid piling heavy items on top.
Label your batches. If you’re saving seeds, note the variety and date so you stay organized for planting season.
With good storage, your dried poppy pods can stay beautiful for years. That’s a whole lot of crafting potential from a single harvest!
Creative Uses for Dried Poppy Pods
Now for the truly exciting part! Once your pods are dried and stored, a world of creativity opens up. These versatile little pods can transform your home, your crafts, and even your cup. Let me share some of my favorite ways to use them.
Crafts and DIY Projects
Dried poppy pods are a crafter’s dream! Their sturdy walls and sculptural shape make them perfect for all kinds of projects:
- Painted ornaments: Add a coat of metallic gold or bright color for stunning holiday decor.
- Shadow boxes and wall art: Arrange pods with other botanicals for a natural gallery piece.
- Wreaths: Wire pods onto a grapevine base for a rustic, earthy wreath.
- Miniature displays: Their tiny “crown” tops look adorable in fairy gardens and tabletop scenes.
If you’re stocking up for craft projects, dried poppy pods for crafts give you a reliable, ready-to-use supply so you can skip the drying step entirely.
Floral Arrangements
This is where dried poppy pods really steal the show! Their neutral tones and interesting shape make them a designer favorite. Try these ideas:
- Dried bouquets: Combine pods with pampas grass, eucalyptus, and dried wheat for that trendy boho look.
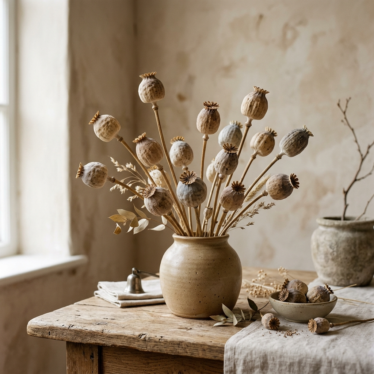
- Table centerpieces: A cluster of pods in a ceramic vase adds instant natural elegance.
- Seasonal displays: Mix pods with pinecones and dried leaves for cozy autumn decor.
Beautiful papaver poppy pods bring that show-stopping structure to any arrangement, and they never wilt!
Poppy Pod Tea and Traditional Uses
Dried poppy pods have a long history of use in traditional preparations, and many people seek them out for this purpose. If this interests you, always research thoroughly and use responsibly. Quality matters here, so starting with premium, well-dried poppy pod tea heads ensures you’re working with the best possible product.
Seed Saving for Gardeners
Don’t forget those seeds inside! Once your pods are dry, simply cut open the top and shake out the seeds. Store them in a labeled envelope in a cool, dry spot, and you’ll have next year’s poppies ready to plant. It’s the gift that keeps on giving!
Prefer to Skip the Wait? Buy Premium Pods
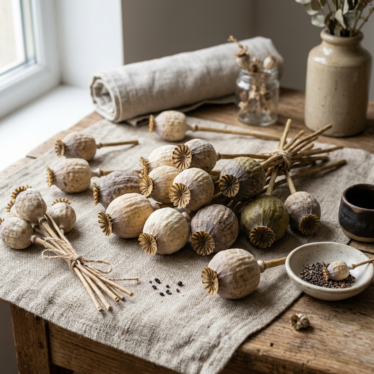
Drying your own pods is deeply satisfying, but let’s be honest, sometimes you want to jump straight to the fun part! If you’re eager to start crafting or decorating today, premium pre-dried pods are a wonderful shortcut.
You can explore beautifully preserved dried poppy pod heads that are ready to use right out of the box. For that show-stopping sculptural shape, the papaver poppy pods are a florist favorite. And if you’d rather dry your own from scratch, fresh poppy pods give you the perfect starting point.
Quality really does matter here. Starting with premium, well-grown pods means better color, sturdier walls, and gorgeous results whether you dry them yourself or use them as-is.
Ready to bring the beauty of poppy pods into your home? Shop our premium poppy pod collection now and discover why crafters, florists, and gardeners trust us for top-quality pods every time!
Frequently Asked Questions
Q: How do you dry poppy seed pods?
A: To dry poppy seed pods, harvest them when they feel firm and the seeds rattle inside, then pick a drying method that fits your space. Hang drying, air drying, and in-situ (on-plant) drying all work beautifully! For most people, hanging small bundles upside down in a dark, airy room delivers the best results. Just be sure to give every pod room to breathe so moisture can escape.
Q: How do you dry poppy pods at home?
A: To dry poppy pods at home, harvest them when firm and the seeds rattle, then choose a drying method. Hang drying bundles upside down in a dark, airy space takes two to four weeks. Air drying on a mesh rack takes one to three weeks. Pods are ready when they feel light and sound hollow.
Q: What is the best way to dry poppy pods?
A: The best way to dry poppy pods is hang drying, where you bundle 5 to 10 pods by their stems and hang them upside down in a dark, dry, well-ventilated space. This keeps the pods straight and preserves that gorgeous natural color. Air drying on a mesh rack is a fantastic alternative for smaller batches. Both methods rely on one thing above all: good airflow!
Q: How long does it take to dry poppy seed pods?
A: Drying poppy seed pods usually takes one to four weeks, depending on your method and conditions. Air drying on a rack takes one to three weeks, hang drying bundles takes two to four weeks, and in-situ drying on the plant varies with weather. Warmth, low humidity, and steady airflow all speed things up.
Q: What is the fastest way to dry poppy pods?
A: Air drying on a mesh rack with strong airflow is typically the fastest home method, taking one to three weeks. To speed things along, keep humidity below 50%, hold temperatures between 60°F and 80°F, and run a gentle fan nearby. Spacing the pods so they never touch helps them dry evenly and quickly.
Q: When should you harvest poppy pods for drying?
A: Harvest poppy pods for drying when they feel firm and the stem shifts from green to tan. Give a pod a gentle shake, and if you hear the seeds rattle, it’s ready! This rattle means the seeds have fully matured. Cut with sharp, clean scissors and leave several inches of stem attached, especially if you plan to hang dry them.
Q: How do you know when poppy pods are fully dry?
A: Poppy pods are fully dry when they feel lightweight, sound hollow when gently tapped, and the seeds rattle freely inside. The color will also shift from green to a soft tan, gray, or silvery brown. If a pod still feels heavy or firm, it’s holding onto moisture and needs more time. Don’t rush this step!
Q: Why are my poppy pods getting moldy while drying?
A: Poppy pods get moldy when there’s too much humidity or not enough air circulation. The fix is simple! Space the pods so they don’t touch, add a fan to keep air moving, and keep the room’s humidity below 50%. Most importantly, never store pods until they’re completely dry. A little patience here saves your whole batch.
Q: Can you dry poppy pods without hanging them?
A: Yes, absolutely! Air drying works great without hanging. Simply lay the pods in a single layer on a mesh screen or tray, keep them from touching, and place them somewhere warm and airy. Turn them every few days so all sides dry evenly. This method is perfect for smaller batches or when you’re short on vertical space.
Q: Can you dry poppy pods in the oven?
A: While you can technically dry poppy pods in an oven on the lowest heat with the door cracked open, we don’t recommend it. Oven drying risks scorching the pods, cracking their walls, and fading that lovely natural color. Air drying and hang drying produce far better results and protect the pod’s shape. Slow and steady really does win here!
Q: How do you store dried poppy pods so they last?
A: Store dried poppy pods in a breathable container like a cardboard box, paper bag, or fabric bag placed in a cool, dark, dry spot. Skip airtight plastic unless the pods are completely dry! Add a silica gel packet to absorb stray moisture, keep pods away from sunlight and heat, and handle them gently. Stored this way, they can stay beautiful for several years.
Q: Can you buy pre-dried poppy pods instead of drying them yourself?
A: Yes! If you’d rather skip the wait and start crafting today, premium pre-dried pods are a wonderful shortcut. You can explore beautifully preserved dried poppy pod heads that arrive ready to use, or grab sculptural papaver poppy pods for show-stopping arrangements. Prefer to dry your own? Fresh poppy pods give you the perfect starting point. Browse the full shop collection to find your favorites!
Happy drying, and happy creating!
